How to Import Images using WinSCP
In
WinSCP the column on the left represents a file on the local machine and the column on
the right represent files and folder on the remote machine.
Step 1: Log in with the given credentials.
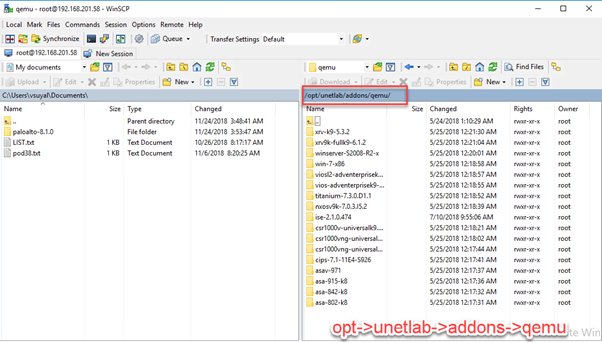
Step 2: Go to the path
opt->unetlab->addons->qemu on the remote machine
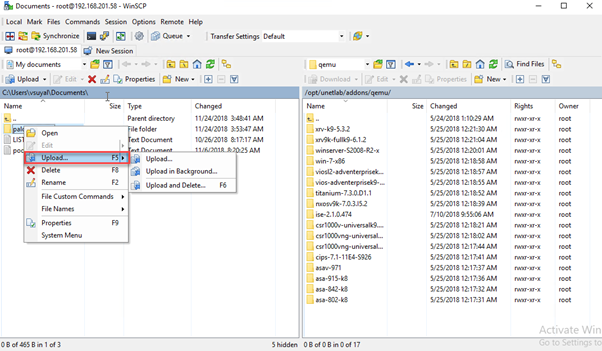
Step 3: Navigate the folder from local to
remote machine and upload.
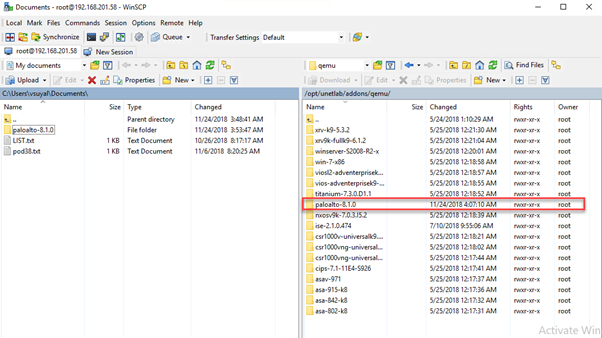
Step 4: Once the process complete, file you have transferred to the remote machine are available immediately.
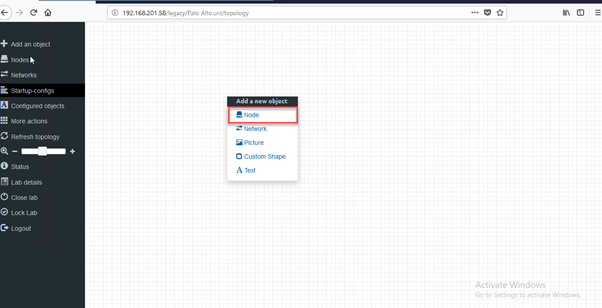
Step 5: Open the EVE-NG in the browser then hover your mouse over ‘add an object’ and select the images
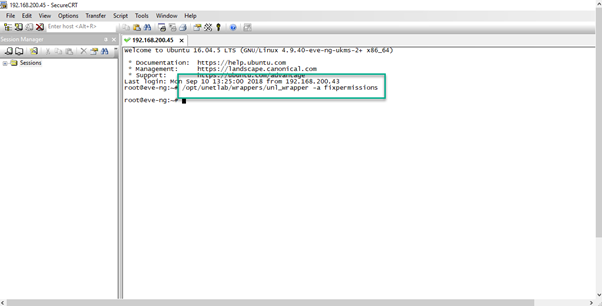
How to Fix permissions?
Login to the Secure CRT with the given credentials and type command
/opt/unetlab/wrappers/unl_wrapper
–a fixpermissions
Related Articles
How to import Dynamips images using WinSCP
In WinSCP the column on the left represents the file on local machine and the column on the right represent files and folder on remote machine. Step 1: Log in with the given credentials. Step 2: Go to the path opt->unetlab->addons->dynamips on the ...Ready to Download Linux Images
Due to very high demand of this section and problems with how to create Linux images under EVE, we are offering ready to go and prepared Linux image pack. You can choose any of Linux image from the pack below and simply upload into EVE. Download your ...How to access Devices Services within EVE Instance using the Jump Host/VD (Virtual Desktop)
Purpose of this Document This document Focuses on helping CML customers understand, how can they easily use a management network to provide devices within the EVE-NG server. Common Use cases Access device GUI from the Jump Box Example: Customer ...Import EVE-NG into ESXI Using an OVF
Credits: Knox HutchinsonImport Labs in EVE-NG
Once you have the Topology on the remote desktop, open EVE-NG session and follow the below steps: Step 1: Click on the Import button. Step 2: Choose the zip file which contains the EVE-NG lab. NOTE: File must be in .zip format, do not unzip the ...