.png?width=70&height=55&name=Removal-642%20(1).png)
Getting Access to the GNS3 Labs Pod
-
There are two methods you can get access to the access detail as mentioned below.
- Check for the Url and Port Number in the email from support@cloudmylab.com

- You can alternatively log in to your account and under my account Rack access, you will see the details

- Check for the Url and Port Number in the email from support@cloudmylab.com
- Login with the credentials provided

- Once you login you will see a customized Desktop from where you can access all the devices.
How to restart GNS3 Server
1. Open Gns3 application from the desktop
2. Click on edit>preferences>server>remote servers
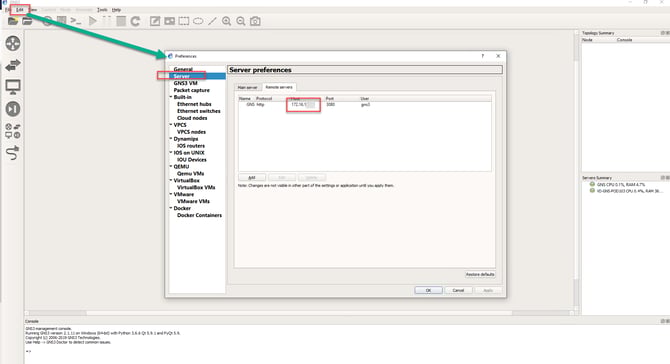
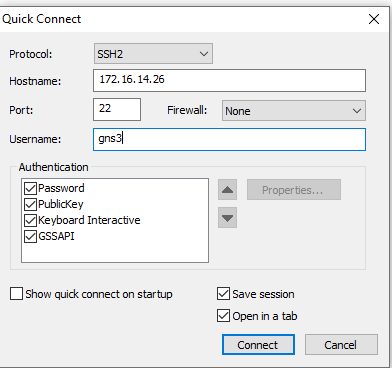
3. Open SecureCrt and ssh to the IP in the server Field
4. Login with username gns3 and password gns3
5. Select ok on the first screen
6. Select reboot on the next screen and press okay to reboot the server
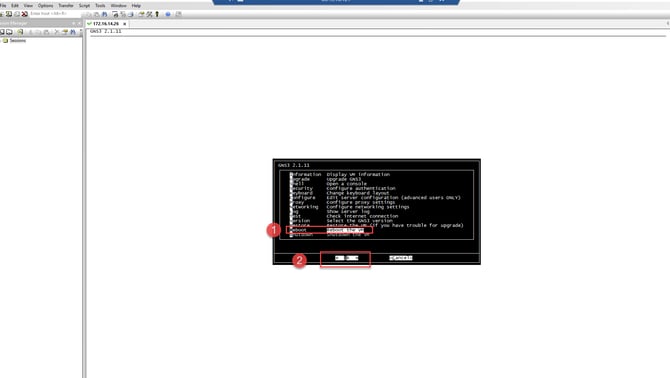
7. Wait for a few minutes for the server to reboot and then log back in.
Simulate Lab in GNS3
-
Run GNS3 as administrator as shown below

-
Create new project

-
Drag and Drop devices from menu

- Click on icon shown below to add link

-
Click on start button to start all devices

-
Click on console button to launch console of all devices

-
Configure the devices

-
Click on stop button to stop all devices

